
Welcome to our Knowledge Base
Creating Multiple Boxes
Table of Contents
Creating Multiple Boxes
1.) Sign in to your dashboard. Reference: https://dashboard.cenports.com/login
2.) From the main dashboard, click Catalog on the left navigation page and go to the Manage SKU tab.
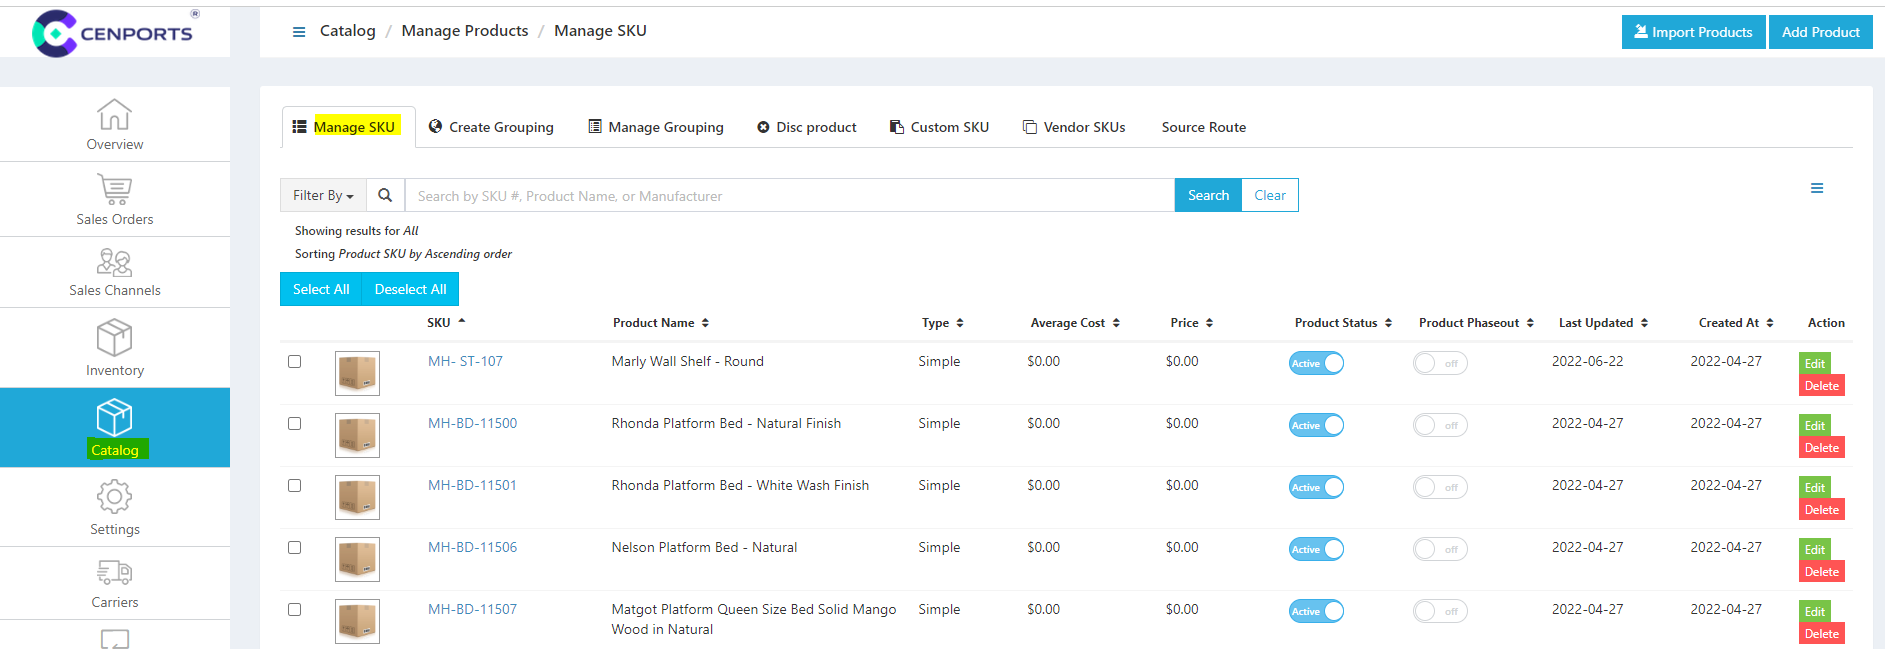
3.) Select one SKU you want to set for multiple boxes and click Edit. Once you click edit, click the Shipping Tab. Under Total boxes, you may select a number of boxes you want for the specific SKU.
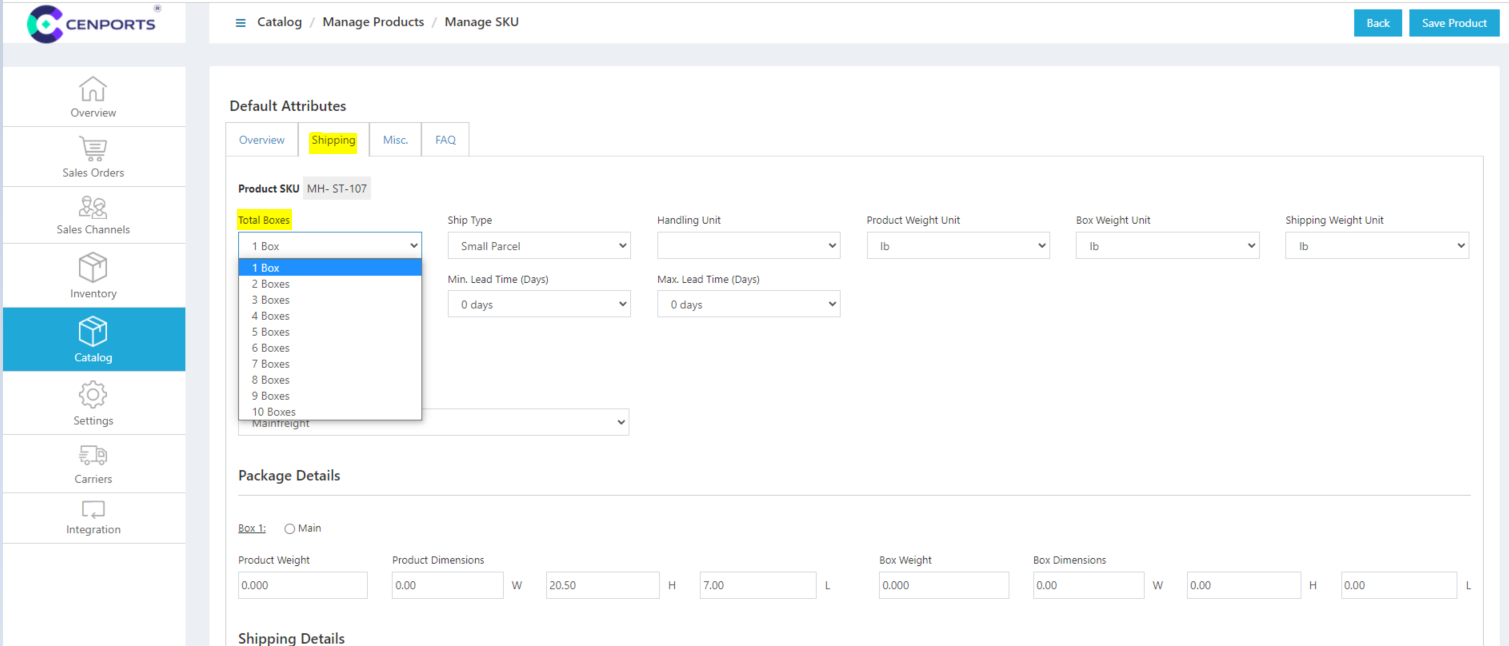
4.) Once you select more than 2 boxes, you may start filling out the information needed.
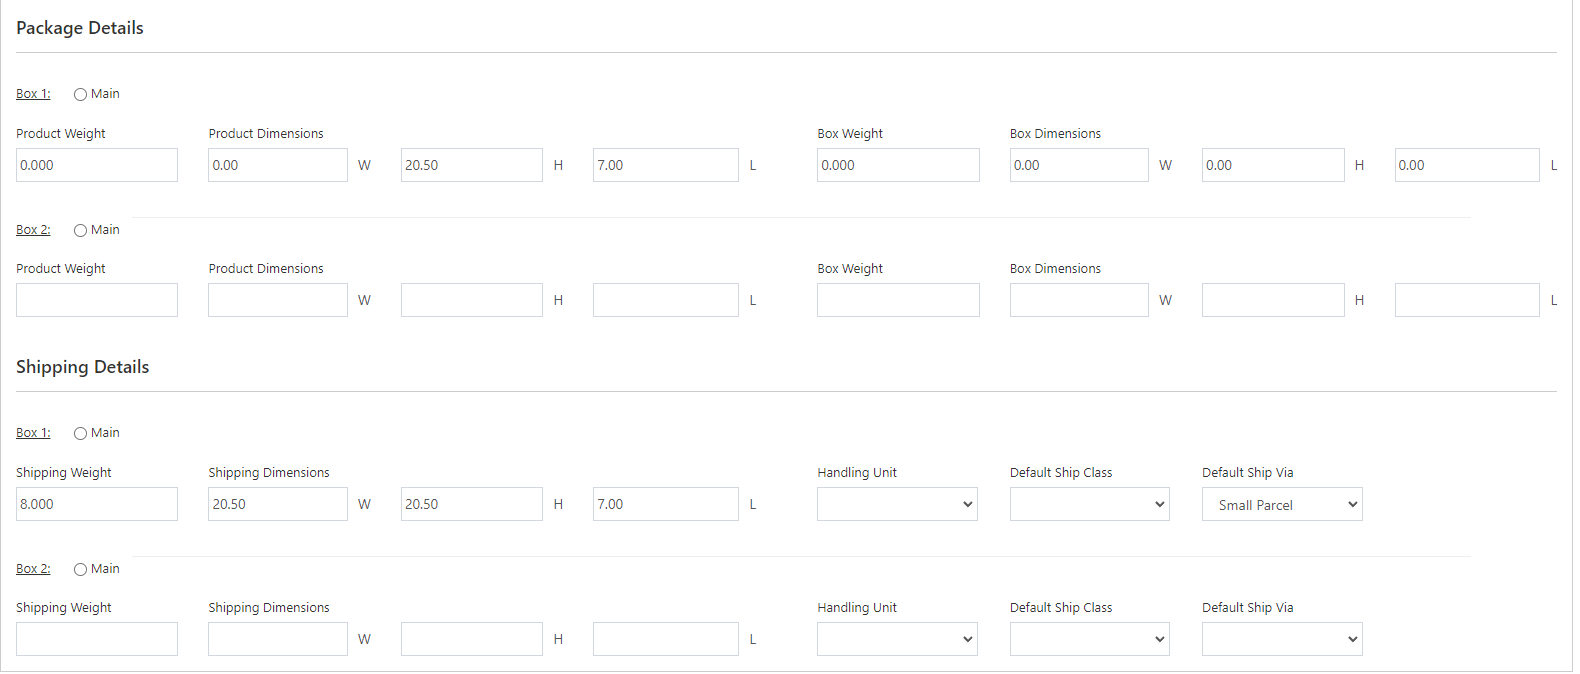
5.) Once you are done with the above information, click Save Product on the upper right corner of the page.

6.) If the product information is being saved, that particular SKU can now be ordered in multiple boxes.